Tuesday 27 November 2012

It's beginning to look a lot like Christmas....


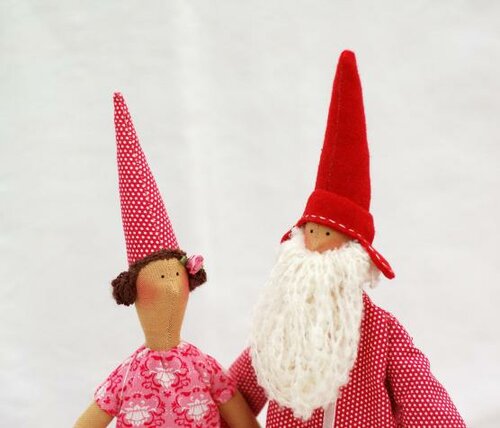
I was coming in this morning to work and I noticed that all the shops on the way have been decorated nicely for the season. I couldn't help getting excited and some where from the corner of my mind a soft melody lurked ....It's beginning to look a lot like Christmas E'wery where..... I was sitting on the tram and just couldn't stop myself humming very quietly until I got in. I will be off soon and will be laying in watching lovely Christmas movies. Oh and of course the best thing to do will be baking endless trays of cookies and sewing lovely pressies for friends and family.Just cannot wait only 11 days to go....... hmmmmmm.Until then here is a small bit of lovely red decorations from nastrierocchetticountry.blogspot.it:
тильда


новогодние тильды


новогодние идеи


своими руками

новогодние игрушки своими руками

красная птичка

снеговик своими руками

новогодняя композиция

новогодние идеи своими руками

своими руками


Tuesday 13 November 2012

Clay Christmas Decorations


I love white especially at winter. Reminds me of the endless fields of white snow where we used to play in the winter time when we small. I love to use this color to decorate at Christmas too especially mixed with red. Blunt and simple.
I have seen a lot of variety of the clay decorations for Christmas. I have tried making them of clay I bought at hobby shop but it was not the best I have to say. I have found a lovely recipe for the clay which I tried and worked perfectly for me.
It is fairly simple and does not require a lot of preparing.

 {Inspiration from Google pictures}

Clay Christmas Decorations

1/2 cup cornstarch
1 cup baking soda
3/4 cup water

Making Clay
In a medium sized pan combine the cornstarch, baking soda, and water. Put it on the hob and stir the mixture over medium-low heat. After a couple of minutes, the mixture will begin to thicken when it has a smooth texture remove from heat. Spoon the dough into a bowl and cover it with a damp cloth until it's cool. When it's cool, knead it on a smooth surface, adding a little more cornstarch if it feels sticky.

Rolling, cutting, and baking

Preheat oven to 175 degrees. Line baking sheet with parchment paper. Roll out clay to 1/4 inch thick on a surface lightly dusted with cornstarch. Use cookie cutters to cut out shapes. Transfer shapes to baking sheet. Poke a hole in the center top of each decoration. Place them in the oven at 175 degrees for about an hour, turning them over halfway through cooking.

Decorate them and thread a piece of ribbon, twine or yarn through the holes.You can also use rubber stamps to add a bit of color. Best used on trees but I love to put it inside cards that I send out or hand over to friends.it is also perfect on presents, like boxes or vine.This year I will be using it as an advent calendar stocking stuffer.

Friday 9 November 2012

Advent Cross Stitch Projects


I was going through some of my old magazines and found these beautiful projects.I usually not that drawn to cross stitching as it takes quite a lot of time for the  images to form but these are really neat and so easy to make. You will fly through and not realize that you are stitching.
 I have photographed two projects from the magazine for you one is a fabric framed NOEL bunting which is made by using heavy paper and fabric. The other one is actually not one but two small  Christmas themed illustrations to use with cards or ornaments. All color codes are supplied below. Happy stitching!


 Noel Bunting

A hint: Do the letters first with generous spacing and make the frame accordingly to fit the size.


 Ornaments and Cards